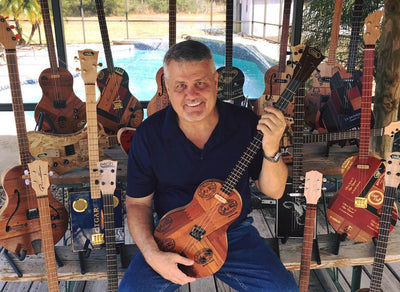


Founder & Owner of MGB Guitars & Parts Supplier Michael Breedlove introduces the new line of MGB Resonator parts and discusses installation.
Check out our line of resonators.
Watch the video here:
Want more videos? Subscribe to our YouTube Channel!
Video Transcript
let's talk about resonator cigar-box guitars I'm sure you're familiar with the resonator guitars very simple principle as the strings are plucked and as they vibrate they transmit that sound down through the saddle into this comb and it has the act of amplifying the sound they were initially made to kind of be a little bit louder guitar than a standard acoustic guitar it was a way of amplifying the sound let's talk about the components that we've recently come up with that you can use to build a cigar box guitar resonator or you build any type of box guitar that would be a resonator we have now the products that you'll need recently we came up with a line of components first being the cone this is something the very typical other cones are out there this is our version six inches in diameter aluminum ours is not spun a lot of people ask if it's hand-spun no ours is made in another process and it's formed we think it'll work just as well maybe not as romantic as a hand-spun but if we think it'll still work and it'll be economic and everybody will be able to use them we're going to have this in two versions currently on our website we have the aluminum but we soon will have a copper version and the copper really gives you a lot of options it's just really beautiful material it's going to tarnish if you want to you could put some acid you could change the color you can do a lot with copper you can even paint these if you want to we also have available with these some covers one we call the spoke stainless steel may just fit exactly on the top of either of these covers it's got a bolt pattern on here so you can screw it down to the box we also have a different pattern that we call the sunburst nice different design we have two options we'll probably come up with some other ones as we go for one of the components we also have is called a biscuit and that's the name of the component that sits on top of the cone it's also the component that holds the saddle which in this case is a bone saddle and again you would treat this much like you do any other bone saddle you would need to describe it and file it to put the string through but again the strings will vibrate through the cone and you'll get a nice sound there's also kind of a different sound it has a little bit of kind of at any metal sound so there really are distinct same thing you have with like a license plate guitar where it has kind of a unique sound of its own well let's talk a little bit about how you would install this we just got these products in I haven't had a chance to build a full guitar but I've got started on one so you can see here so let's talk about some of the important things about installing a resonator installing a resonator is really a very precise operation on a lot of the other things you do you have a little bit of a wiggle room because some of those components can be adjusted for example a normal bridge has a lot of adjustment if you get within a quarter of an inch you can adjust it and get that scale length right you don't have the same flexibility with a resonator there are some things you can do with the neck but for the most part you need to be pretty precise let's talk about this here's a little tip get some shelf paper buy it at Walmart just plain old white shelf paper what I've done is I've covered this box because again it's very critical that I know exactly where I'm going to put this comb I've got a neck here and again it's inch scale length so what I've done is I'm out I'm sliding my cover on to the neck taking my tape measure I'm measuring down and I'm putting a mark at and a half because that's the scaling twenty-five and a half inches then I used my squares I drew a line perpendicular across there I have a center line running up the center so I know that exactly at that point right there at the intersection of those two lines is exactly where I want the center of that cone now there's a little bit of wiggle room and we'll talk about it but it's very critical that we know exactly where that location is and it's exactly and a half inches away well the next step is cutting that out cutting that hole out and we are offering the tool we're going to have it available on our website that we think will make that easier and what it is is basically a template and the template has a couple of guide marks and again if you've marked your lines you can simply lay this template on there line it up there's holes here holes here and then we're going to adjust with the side holes with the side marks and so now based upon these marks I now know exactly where that resonator cone should go and I come in hold us down and I mark it and now I've got the hole that I need and by the way for a six-inch resonator cone the hole needs to be about five and a quarter inches so you can come back now however you want to cut this maybe you have a jigsaw maybe you have a handsaw maybe use the dremel tool there's a lot of different ways of cutting this hole you can cut it file it sand it and get it perfectly round so it would look basically like this drop in your resonator cone and you're good to go one thing to keep in mind these lines here are really helpful because what that could do is again the way these covers are made you can now line up a top and a bottom and that'll get it in the center this way you can line up these holes over here and that will get it lined up this way drill your and that will make sure that the resonator cone is centered right over that Center mark that's very critical so again that's really really what you need to do to cut the opening there's a lot of a lot of other things you can do as far as putting it together there's a lot of ways you can get that sound piezo czar a way to go pickups are way to go the combination of both a lot of experimentation on this one what I did is I took one of our piezo and I put it inside on the backside of the comb and then of course I put the pickup here I have a nice one of our hot tunas up here in this case I'm using a new a new wiring harness that we've got up the guy coming out so early it's called a blending pot and what that actually does is it hooks up both the piezo and the hot tuna and then depending on how you adjust it you can fade it from one to the other and it really is helpful with piezo is because we're always kind of so loud so sensitive and they make a lot of noise and we tend to need to tone those down and make sure the pickups come up but again you can experiment the important thing is to get a reso get it in a box get it lined up get it adjusted sometimes if you have to you might need to just move that biscuit around just a little bit to get the intonation right by the way while I'm talking about it on this biscuit this bone saddle is not in the center as you might accept expect it's actually off site a little bit in other words this line here is actually in the very center of the biscuit and the and the the saddle sits to the other side of it so again if everything is lined up perfectly it should work out fine and you should be able to maintain your scale length on there if not there is a little bit of room our biscuit is a little bit smaller than the flat swap so you have some room to bite to move a little bit you can also maybe change the angles a little bit if you want to adjust the antonation but you got to stay pretty close well I hope this is helpful this is something you should try something you should add to your line of guitars I think you'll like it makes a different sound really a really good idea thank you very much keep in touch let us know if we can help you thank you